React Native - 스플래시 화면 설정(splash screen)
다양한 어플을 실행해보면 의식하지 못할 뿐 로딩 화면이 존재하는 것을 확인할 수 있다. 이렇게 어플이 구동될 때 보여주는 시작화면을 splash screen 혹은 launch screen 이라고 부른다. 필요이유는 어플이 작동하기 위해서 필요 데이터를 로딩하거나 버전체크를 하거나 하는 사전작업이 필요한 경우 자연스럽게 딜레이가 걸리게 되는데 그동안에 사용자에게 매끄러운 사용경험을 제공하기 위함이다.
본인 역시 출시한 어플에서 데이터 로딩 및 버전체크 등과 같은 몇몇 사전작업이 필요하여 splash screen을 추가했고 이와 더불어 root screen을 splash screen과 비슷한 디자인으로 제작하여 상태 관리까지 병행하는 이중 구조의 splash screen을 구축했다.
RN에서 가장 대표적인 splash screen 라이브러리는 react-native-bootsplash와 react-native-splash-screen이 있다. 이 중 본인은 최근까지 업데이트가 지속되고 있고, 어플 아이콘을 토대로 splash screen을 제작해주는 편의성을 지니고 있는 react-native-bootsplash를 선택했다.
https://www.npmjs.com/package/react-native-bootsplash
react-native-bootsplash
Display a bootsplash on your app starts. Hide it when you want.. Latest version: 6.3.3, last published: 2 months ago. Start using react-native-bootsplash in your project by running `npm i react-native-bootsplash`. There are 46 other projects in the npm reg
www.npmjs.com
1. 설치
npm i react-native-bootsplash
#or
yarn add react-native-bootsplash
2. 4096px x 4096px 앱 로고 이미지(.png) 파일 준비
해당 라이브러리에서 assets를 생성하기 위해서는 4096px x 4096px 에 맞는 어플 로고 이미지(.png / .svg) 파일이 필요하다. 본인은 사이트의 도움을 받아서 어플 로고를 제작했었는데 그 때 유용했던 어플은 아래와 같다.
https://www.appicon.co/#image-sets
App Icon Generator
www.appicon.co
EasyAppIcon - Create Mobile App Icon
EasyAppIcon helps you to create your own app icons easily. Supporting Android Adaptive Icon! You can simply import the icons to Android Studio and Xcode.
easyappicon.com
3. 설정
android/app/src/main/java/com/[app]/MainActivity.{java,kt}
// Kotlin (react-native >= 0.73)
// …

// add these required imports:
import android.os.Bundle
import com.zoontek.rnbootsplash.RNBootSplash // add

class MainActivity : ReactActivity() {

  // …

  override fun onCreate(savedInstanceState: Bundle?) {
    RNBootSplash.init(this, R.style.BootTheme) // initialize the splash screen
    super.onCreate(savedInstanceState) // super.onCreate(null) with react-native-screens
  }
}
4. Assets generation
생성한 4096px 사이즈의 이미지를 원하는 경로에 넣어준 뒤, 터미널에서 아래 명령어를 실행한다.
react-native generate-bootsplash [image path]
# ex) react-native generate-bootsplash assets/images/app_icon.png
이 때 다양한 옵션들이 있는데 필요에 따라 argument를 살펴보고 하면 된다.
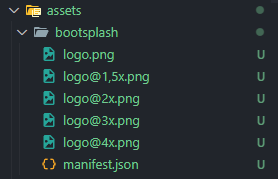
실행해보면 아래와 같이 bootsplash 폴더 안에 이미지가 생성된 것을 확인할 수 있다.
5. 코드
Bootsplash 화면은 자동으로 실행되기 때문에 hide 해주는 코드의 위치가 중요하다.
기본적으로는 App.tsx 파일에 useEffect 안에 위치하면 된다.
아래 예시코드는 지난번 SQLite에서 사용했던 코드를 활용한 것으로 DB연결 및 테이블 생성과 같은 작업도 어플 시작 단계에서 이루어져야하는 사전작업이기 때문에 그 과정이 끝난 후에 hide 시켜준다.
// App.tsx

import './global.css';
import {SafeAreaProvider} from 'react-native-safe-area-context';
import Navigation from 'navigation';
import {RecoilRoot} from 'recoil';
import Toast from 'react-native-toast-message';
import {toastConfig} from '@/config/toast.config';
import {GestureHandlerRootView} from 'react-native-gesture-handler';
import SQLite from 'react-native-sqlite-storage';
import {useEffect} from 'react';
import BootSplash from 'react-native-bootsplash';

const App = () => {
  SQLite.enablePromise(true);

  const getDBConnection = async () => {
    return SQLite.openDatabase({
      name: 'test.db',
      location: 'default',
      createFromLocation: '~www/test.db',
    });
  };

  // Create KoreaMapData to map table
  const createTable = async (db: SQLite.SQLiteDatabase) => {
    const query = `CREATE TABLE IF NOT EXISTS test(id TEXT UNIQUE PRIMARY KEY, title TEXT, contents TEXT, count INTEGER);`;

    return await db.executeSql(query, []);
  };

  // Create SQLite Table (If exists, no create)
  const init = async () => {
    const db = await getDBConnection();
    if (db) await createTable(db);
  };

  useEffect(() => {
    init().finally(async () => {
      await BootSplash.hide({fade: true});
    });
  }, []);

  return (
    <RecoilRoot>
      <GestureHandlerRootView style={{flex: 1}}>
        <SafeAreaProvider>
          <Navigation />
          <Toast config={toastConfig} />
        </SafeAreaProvider>
      </GestureHandlerRootView>
    </RecoilRoot>
  );
};

export default App;
또 다른 방법으로는 Navigation에 위치해주는 방법이 있다.
// Navigation.tsx

const Navigation = () => {
	return (
    	<NavigationContainer
            onReady={() => {
            BootSplash.hide({fade: true});
        }}>
            {/* content */}
        </NavigationContainer>
    )
}
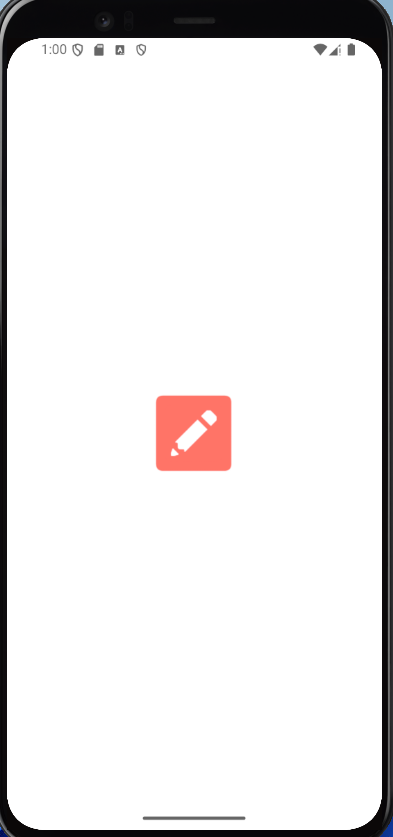
6. 실행
실행해보면 아래와 같이 splash screen이 나타난 후에 메인 화면으로 전환되는 것을 확인할 수 있다.